Home

Saturday, February 28, 2015

Book Study: Worksheets Don't Grow Dendrites Chapters 1 & 2


I am stoked about joining this book study to learn how to better engage my students through reading Worksheets Don't Grow Dendrites by Marcia L. Tate.

I set the stage... highlighter, coffee, cupcake...check, check, check!


Thanks Elizabeth for Kickin' it off at Kickin' it in Kindergarten!

I've always been a huge advocate for hands-on learning (especially since my first 2 years of teaching were in PreK and worksheets are NOT an option). It's great to be reaffirmed that so much of what I do daily in my classroom is research based! Yet, after reading the first two chapters I have a growing list of other strategy ideas I can start implementing!

At the beginning of the year, I feel like I spend a lot of time setting the ground work for productive discussion. I teach/model when to talk, how to answer a question, what it means to stay on topic, and how to be a good listener when someone else is talking. Routines and expectations are the framework for effective discussion.

Here is my favorite "trick" for giving students wait time...while holding the "blurters" at bay (a difficult balance in Kindergarten)...
I give a question and tell students to "whisper the answer" in their hand. They keep the answer "trapped" until I see that everyone has had time to process the question (their fists are in the air). When I open my fist, they copy me and "let out" the answers by saying them out loud.

A growth area for me is asking questions at various levels on Bloom's Taxonomy. It takes time to develop quality questions that stimulate higher-order thinking. One action step I plan to take is to develop a variety of questions (at various levels) for some of my read-alouds. I will type them up and tape them inside the book's cover so I have them ready!


It's obvious - ART is in SMART! I have always loved integrating art into daily learning.  My love for art is a reason I have an well stocked Art Center in my classroom. This is a FAVORITE center ALL YEAR LONG! During play time, I often have students take supplies to their table spot because all of the seats at the center are full. I rotate supplies and add word walls correlating with our themes. I also add dictionaries, themed vocabulary binders, and bar graph templates to encourage writing.

Here's two recent example of how we've integrated math and art.We created our own stick structures after reading 6 Sticks by Molly Coxe.

Then we counted how many sticks we used in our design and wrote the sentence:
 "____ sticks make a _____."


Volcano!

Symmetrical Hearts: We decorated a backdrop for our Valentine's program. Each child painted one of their hearts with a symmetrical design.

Not going to lie... it takes time to prep art projects! But the active learning that happens as a result is SO worth it!

Tell me, I forget. 
Show me, I rmemeber.
Involve me, I understand!
- Old Chinese Proverb

Friday, February 27, 2015

Five for Friday: Rhyme Time with Dr. Seuss

Who doesn't love Dr. Seuss? Favorite children's author - HANDS DOWN!
This week is all about the rhymes! I'm linking up with Doodle Bugs Teaching for a little Friday fun!

We started this week with Cat in the Hat himself. After reading, we did a little guided drawing... can't help but love these!


It didn't take long for things to get Wacky! 
My students thought their clothes and hair were going to be the only things Wacky about Wednesday.... but they were WRONG!


We had a lot of fun with nonsense words... or as I like to call them... "Dr. Seuss words".

Students created their own crazy creatures. They glued them into tiny craft pockets and created  a rhyming name.

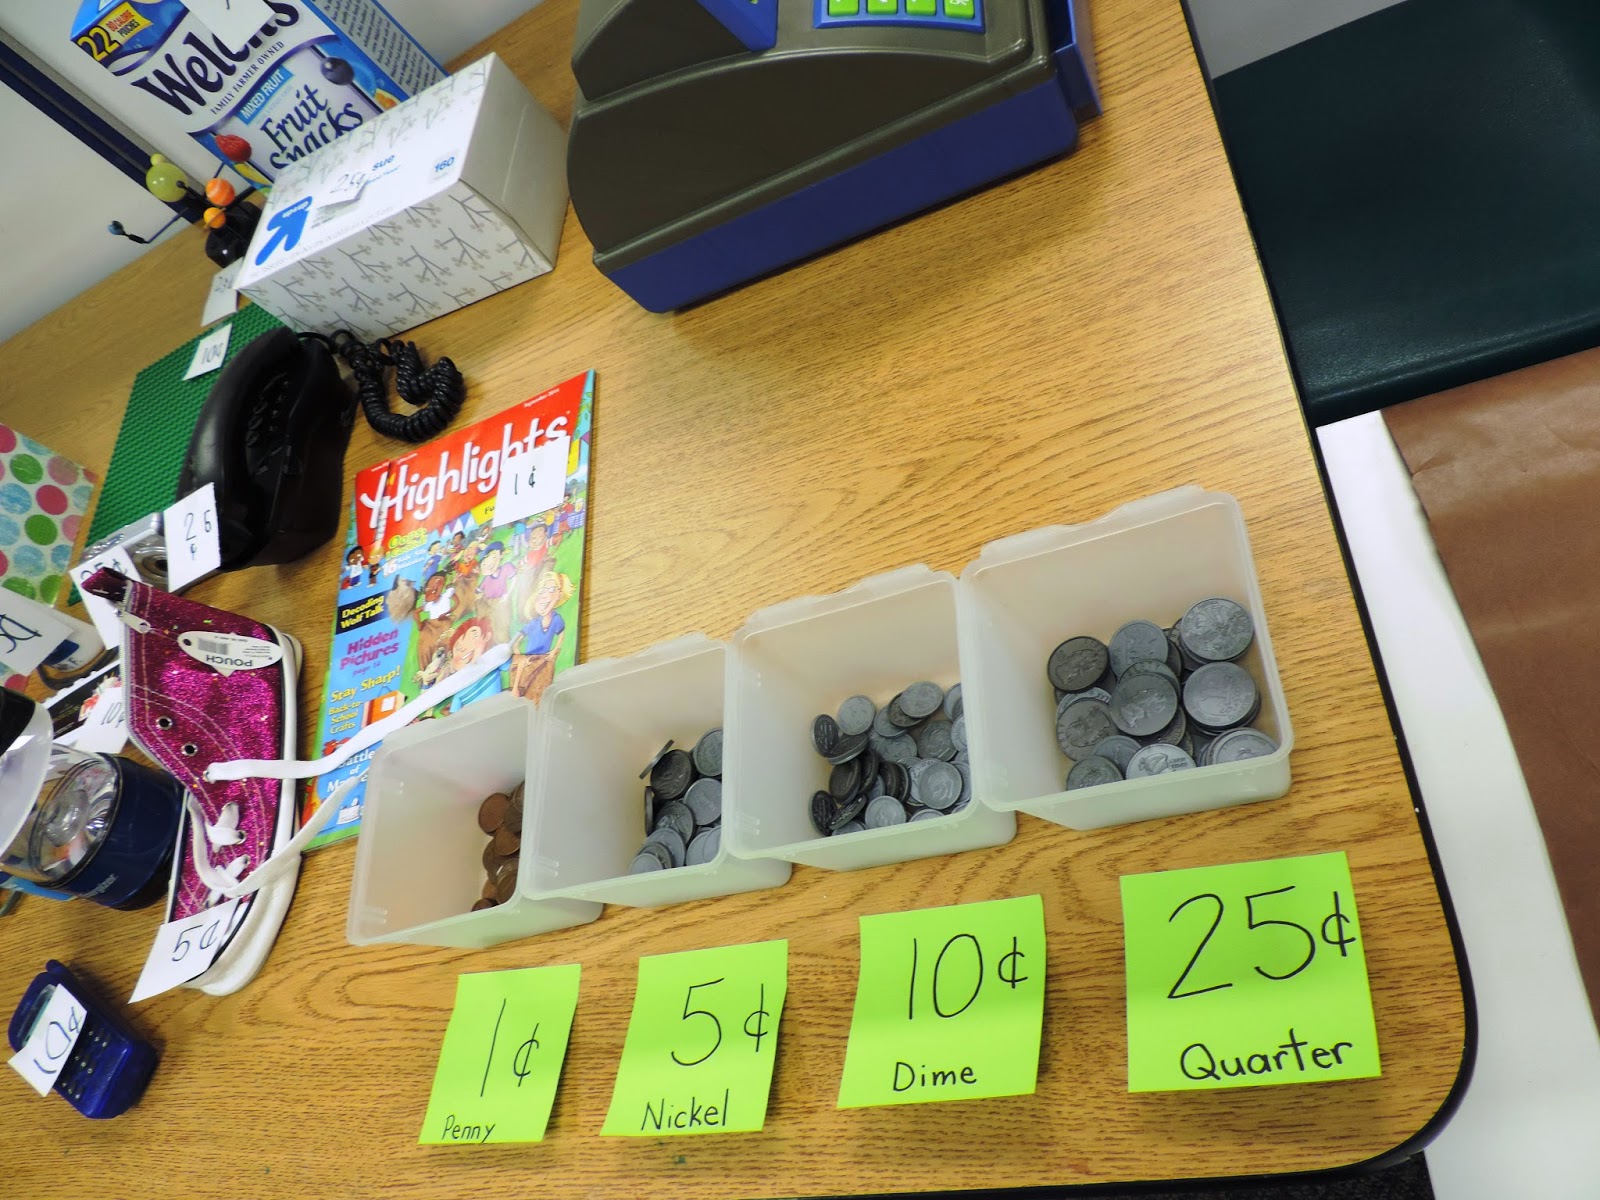
Calling all shoppers! It's our classroom store's GRAND OPENING! Our math unit is focusing on coin names and values. (Mini Rant: Why couldn't coins have sizes that make sense!?! Why is a Dime the smallest coin yet worth more than a Nickel and Penny? A size-value correlation would make this unit so much easier! End of rant.)
Anyways... we did some serious shopping this week.

 How could you not with these unbeatable prices?
Students made all of the price tags.
When students came to the checkout, with their purchases, they had to tell me the name of the coin they needed to pay with and the value of that coin.
If they wanted a turn as the cashier, they had to identify names and values of every coin- very motivating!

Bulletin board paper + IKEA table + Tape = Conveyer Belt


On Monday we will be celebrating Dr. Seuss's birthday with green eggs and ham. Students make and wear their own "Cat in the Hat" hats just for the occasion. A volunteer even comes in to paint faces with black noses and whiskers.

A parent made these adorable marshmallow hats one year, and I've been carrying on the tradition ever since. SO EASY! Just dip 1/2 the of each marshmallow in water before rolling in red sprinkles and let dry before stacking on a lollipop stick.
"If you never did you should! These things are fun and fun is good!"~ Dr. Seuss

Friday, February 20, 2015

Five for Friday


I'm linking up with Doodle Bugs Teaching to wrap up this week!


What does it take to be a good leader? We answered this question as we read about two of our great presidents: George Washington and Abraham Lincoln. Leaders are caring, brave, honest, readers, and problem solvers. You should have seen the looks on their faces when I said THEY could be president one day!!
We made patriotic star patterns on George's three cornered hat.

I forgot to take a pic, but Lincoln's hat can flip up to reveal a "special note" saying: "Abraham Lincoln was our 16th president". He used to carry mail and important papers in his hat to keep them safe since his desk was always unorganized........I think I may need a hat!


We finally have snow!!! It's been a mild winter. (NOT complaining!) But you gotta have snow when it's your theme! We talked about how we are like snowflakes - God made each of us unique!
Snowflake Bentley by Jacqueline Briggs Martin is a must read! Wilson Bentley is enamored with snowflakes and is determined to share the beauty of their uniqueness with others - through photographs.
We then created our own one-of-a-kind snowflakes out of coffee filters.


Just like "Snowflake Bentley" used a microscope to magnify snowflakes.... we did a little magnifying of our own... CVC WORDS! Check out A Teachable Teacher's TpT store to grab a copy.


If you could only "feel" the paint on this picture. It's 3D snow paint! Mix shaving cream and Elmer's glue to create a foamy-feeling piece of art. My students had a blast creating their own version of "Olaf". When they dried, we measured them with cubes.


Do you ever review sight word flash cards and your class is..... picking their nose, lip syncing the words, or collecting random crumbs on the rug? (Please tell me I'm not the only one!?!) I primarily use hands-on activities and fun games to review sight words. But sometimes we just gotta fly through all of them to stay fluent!

I made a tiny adjustment to our sight word review.... and EVERYONE wanted to participate! Just add 2-3 pictures of a lion randomly in the flashcard pile. Every time you get to the lion, the class gets to let our their fiercest ROOOOAAAARRR!!! It was an amazing transformation! They wanted to say the sight words quickly! AND their eyes were on me since they didn't want to miss their chance at letting out their inner lion.

Sight Word ROAR!

I always look forward to conferences. I am so thankful for wonderful families who are committed to helping their child learn and grow. Time with them is so valuable!

There is always so much to cover at each conference. This Glow and Grow Report is helpful in summarizing the report card. We have one more day of conferences next week... so I will be finishing the rest this weekend.

Enjoy the weekend!

Sunday, February 15, 2015

How to Effectively use Individual Whiteboards

Individual whiteboards are a classroom necessity. When we are using them as a whole group I can quickly assess any skill: phonics, sight words, number identification, addition...you name it!
Unlike a worksheet, we can work on a skill for a short amount of time without there being a stack of worksheets in the "finish later" pile. I can adjust the activity to fit my time frame.

Here are some tricks I've learned to manage and maximize individual whiteboard use.


1. Put the dry erase markers in socks. Students take a sock and the color is a "surprise". No more arguing or wasting time over rummaging for which color they want. The sock doubles as an eraser too!


I purchased socks at the dollar store. Next time I will buy black socks so they don't look so dirty.
2. When students get a whiteboard I always give them a challenge so they are not just sitting and waiting to start: "After you get a whiteboard and marker, see if you can print to 20 before it's time to start." Once everyone has their supplies it's time to wipe our boards and listen for directions.


3. I always keep a tally chart. "Teacher versus Students" The goal is that they will earn more points than me when doing the activity. They earn points by listening, doing their best work, and answering correctly. I earn points if they do the opposite....oh, and if they blurt! It only takes one point on my chart to silence the blurting. It's like magic!

Game on!

4. Today I used white boards to assess skip counting. I'd say "Write the missing number when I skip count by 10s: 10, 20, 30, 40, ___, 60, ..." They quickly write down the missing number while I walk around and give prompts to students who may be struggling. When I call "Boards up!" They flip and lift their boards so I can see their answers. (If there are incorrect answers, I will give 1 point for trying and then give them a clue to fix it for a second point.)


"Boards up!"

5. If they earn more points than me... (which is almost always)... they can earn 3-5 minutes of free draw time on their whiteboards. This is a HUGE motivator for them to "win".
Earning points for "free draw"

Words of Wisdom: It's important to state your expectations at the beginning of any activity. We discuss that this activity is not a time to do "your own plan". You can draw and do what you want to do on the whiteboards if/when the class earns free draw time at the end.
Every once in a while I will notice a student holding the board at a higher angle than usual... and they have that all too familiar "guilty face". Hmm! If they are doodling....or drawing on the rug....I calmly take away the whiteboard and give them a "boring" piece of paper and pencil to use for the remainder of the activity. Students quickly catch on that they benefit by following the procedures.

What are some of your tricks for using individual whiteboards?